- Home
- About
- Practice Areas
- Personal Injury Overview
- Car Accidents
- Bicycle Accidents
- Burn Injury
- Brain Injury
- Dog Bite
- Vibrio Vulnificus
- Infection from Saline Solution
- Motorcycle Accidents
- Pedestrian Accident
- Product Liability
- Scooter Accident
- Slip and Fall Accidents
- Spinal Cord Injury
- Underinsured Driver Accident
- Rideshare Accident
- Truck Accident
- Wrongful Death
- View All +
- Testimonials
- Results
- Resources
- Español
- Contact
Helping Colorado’s accident
victims for over 25 years.
victims for over 25 years.
Summer Motorcycle Maintenance Checklist
POSTED BY
April 11, 2018
Motorcycles
Tips
You’re ready to ride those beautiful Colorado roads all summer long, but is your motorcycle ready?

I’m not just an attorney at The O’Sullivan Law Firm. I’m a biker. And I’m not just a biker, I’m a certified bike lover. I have five motorcycles sitting in my garage right now just waiting for me to rev ‘em up and take ‘em out this summer!
Before becoming an attorney, I worked in the motorcycle industry. I attended the Motorcycle Mechanics Institute in Phoenix and, upon graduation, I was hired by a BMW dealership where I became a certified mechanic. I loved it, but the boss found out that I was also good at talking to customers, so I was “promoted” to a service advisor position, which turned out to be a good thing, as that eventually led to my becoming manager of the service department. Then, I went totally crazy and went back to school to become a personal injury attorney.
Most people don’t realize that tires have a shelf life.
So, yeah… I sort of know what I’m talking about when it comes to motorcycles – mechanically and legally – and I thought I’d write today about summer motorcycle maintenance and how to get your bike ready for riding those Colorado mountain roads after a long winter of sitting around. With that said, at this point, I’m guessing that your bike is in one of two conditions:
- Winterized properly last fall.
- Ridden hard and put away wet last fall.
I’ll share some tips below for getting any bike out of winter storage, including some special tips for those who didn’t winterize, and how to get your bike summer ready.
Summer Motorcycle Maintenance Tips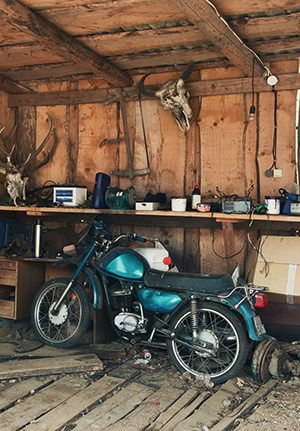
- Test the battery: Whether your battery has been stored in a warm, dry place on a charger or just left in your bike, you should take it to an auto parts store and ask them to do a load test, also called a “dynamic test.” (The volt tests you can run in your garage won’t tell you much about the true health of the battery.) Assuming the battery is in good condition, install it on your bike. If your battery was completely dead, you really should buy a new one. You might be able to charge up a dead battery and get the bike started, but it puts a hell of strain on the charging system and will probably leave you stranded somewhere. To give your battery a longer life, it’s best to bring your battery inside through the winter and put it on a trickle charge every couple of months.
- Check your tires: Obviously, check the tire pressure. Then, check their age. Most people don’t realize that tires have a shelf life and you shouldn’t use them after they are five years old. They become hard and offer less traction, which could get you injured. If you’re not sure how old your tires are, look on the side of the tire and find the DOT #. It’s a long number. At the end of that number, stamped into the tire, you’ll find four numbers that are about 3/8 inch high and they are in an oval. They tell you when the tire was manufactured. If it says “1009” it means they were made in the tenth week of 2009. Also, if your tires were flat, check for cracks where they rested on the floor.
- Check your fuel: Pop the fuel cap and smell the gas. Old gas has a rancid odor. If you stored your motorcycle without a lot of fuel in the tank, it is likely that the old fuel was exposed to a lot of air and it probably went bad. If it smells funky, go get some new gas and pour it on top of old gas to blend in some good stuff.
- Check all your lights: Make sure your headlights, running lights, tail lights, and turning lights work. Also, check your horn.
Go back home and let it sit for 30 minutes and check for leaks.
Now, if you don’t have a carbureted bike, you can fire it up! Put your helmet and jacket on and take an easy ride around the block. Go back home and let it sit for 30 minutes and check for leaks. If everything looks good, then ride it like you stole it! Go on a long ride and get rid of the old gas in the tank.
Special Instructions for Carbureted Bikes

If your bike has a carburetor and you left gas in it over the winter, you’re pretty much guaranteed to have some issues. If you winterized your bike and got the gas out of the carburetor, you’re close to riding time!
If you stored it without getting gas out of the carburetor, here are the steps you need to take to finalize your summer motorcycle maintenance:
- Take your battery out: Some of the steps below may cause an unsealed battery to leak.
- Drain the carburetor: There are two ways to do this, one is for bikes equipped with a float bowl drain, one is for those that are not:
- Without a float bowl drain: Take your bike outside (don’t do this where you may cause a fire hazard) and put a very large pan or cookie sheet next to the bike. Make sure the fuel tank is turned off and lean the bike onto its side over the pan. You don’t need to lay your bike all the way down, but you need to go far enough to get a good flow of gas out of the carburetor. I usually go until the foot pegs or floorboards are folded up all the way. If you have a heavy bike, get some help before trying this. Once the fuel stops flowing, the carburetor float bowl is drained.
- With a float bowl drain: Keep the bike upright. Get a small bowl ready. The float bowl drain is a small screw at the bottom of your carburetor; crack it loose but don’t remove it. Hold the bowl ready and catch gas until it drains completely. You need to do this for every carburetor on your bike.
 After draining, stand your motorcycle up and put the battery in. Then, try to start the bike up. Depending on how you stored it, the bike may or may not start. There’s a common problem that those of us in the biz call a “munged-up carburetor.” It means that the tiny jets in your carburetor got clogged and the bike will start but it won’t idle. It dies when you try to idle.
Typically, clogged jets mean you have to pull and clean the carburetors; however, I have one mechanic’s trick you can try before going that route:
- Find the air intake to the air box. It may be under the seat. This is the large box that holds the air filter and all the carburetors are attached to it.
- Now, get your bike warmed up. I mean, really warm! Give it full throttle, red line it until it’s screaming its heart out.
- Then, stuff a rag into the opening of the air box. Cover the opening completely. The motor will make some crazy noises and then it will die.
- Try starting it again to see if it idles.
What does this do? The engine is sucking a lot of air. When you close the air box off, the engine will get air wherever it can and the only way is through the carburetor float bowl. Sometimes, that is enough to dislodge the gunk from your jets. This might get you on the road, but it is more of a temporary fix and for maximum performance and reliability you really should get your carburetors cleaned.
Keep in mind that there’s a saying in the motorcycle biz, “carburetor is a French word for ‘leave it alone!’” Unless you know what you are doing, leave it to the professionals.
With proper summer motorcycle maintenance, we’ll all be riding the roads this summer!